What Is a Web Map?
An ArcGIS web map is an interactive display of geographic information that you can use to tell stories and answer questions. For example, you may find or create a map that addresses the question, How many people in the United States live within a reasonable walk or drive to a supermarket? This map has layers showing which neighborhoods are within a 10-minute drive or 1-mile walk to a supermarket, and for context, the map has a topographic basemap that includes cities, roads, and buildings overlaid on land cover and shaded relief imagery.
Maps contain a basemap, a set of data layers (many of which include interactive pop-up windows with information about the data), an extent, and navigation tools to pan and zoom. In general, the basemap and layers are hosted and shared through ArcGIS Online. However, maps can also contain layers added directly to the map and layers and basemaps referenced externally. Many maps also contain scaled symbols and other smart styling that reveal data and patterns as you interact with it. For example, the map below shows the relative magnitude of earthquakes that happened over the previous 60 days.
Maps can be created in a few basic steps and opened in standard web browsers, mobile devices, and desktop map viewers. They can be shared through links, embedded in websites, and used to create map-based web apps. When a map is shared, the author decides what to include with the map. For example, when the map is shared to the general public through Map Viewer, the map includes options to switch basemaps; view a legend (if the map contains one); view details about the map; share, print, and measure the map; and find locations on the map. Signing in to Map Viewer with an ArcGIS account may reveal additional options for adding layers, performing analysis, getting directions, and so on. Maps embedded in websites and shared through apps often contain a focused set of tools for a specific purpose, such as collecting information, editing features, or comparing two maps side-by-side.
Content in this section was adapted from “Reference: What is a Web Map?” (ArcGIS.com)
Creating a New Web Map
If you are saving a map for the first time or saving a copy of a map, follow these steps:
- To open a new map of your own, click the “Map” menu item in the ArcGIS Online menu bar, then click the save button. To save a copy of someone else’s map, open it and just click the save button. (You can only do this if the user has given others permission to copy their map.)
- Give your map a title.
- Add tags that describe your map (required).
Tags are words or short phrases that describe your map. Separate terms with commas. Federal land is considered one tag, while Federal, land is considered two tags. - Provide a summary that describes the map (optional).
- Click the “Save Map” button.
- Save your map progressively as you add layers and make edits: ArcGIS Online maps do not save automatically, and you could lose your map progress if you close it without saving, or if you lose your Internet connection.
Content in this section was adapted from “Get Started with Map Viewer” (ArcGIS.com)
Steps for Building a Web Map
Choose basemap
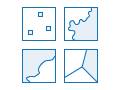
Maps should do something meaningful, such as tell a story, present an idea, or showcase a situation. To do this, you should choose a basemap and layers that have great cartography, work at multiple scales, draw quickly, contain informative and accurate information, target a specific audience, and have visible legends if the symbology is not intuitive. Learn more about basemaps.
Add layers

Layers are the contents of your story. They can include topics related to people, Earth, life, and imagery. You can add one layer or multiple layers. By bringing together multiple layers, or data sources, into a single map, you can help tell a more interesting story. Be careful, however, that you don’t add too many things to one map and make it hard to read. In addition, it may help your audience understand your map if you add some features that are not part of an existing layer. For example, you might want to add some photos and captions within a recent fire perimeter. You can add features by adding a map notes layer or importing features from a file. Learn more about layers.
Change style

Geographic data can be styled many different ways on a map. When you want to change the way your layer is styled, you are presented with different ways to style the data along with options for each of those choices. The choices you see will change based on properties of the data itself. You can choose different symbols to represent the features you’ve added to your map. For example, water bodies and streams might be shown with a single, constant blue color. Roads might be symbolized based on road class. Seismic events, such as earthquakes, might be represented using graduated symbols based on their magnitude, and polygons might be classified based on land use. Learn more about styles.
Configure pop-ups

Pop-ups bring to life the attributes associated with each feature layer in the map, such as hiking trails, land values, or unemployment rates. They can show attachments, images, and charts and can link to external web pages. The default pop-up appearance for a layer is a plain list of attributes and values. You can configure the pop-ups to define the list of visible and hidden fields and how to present that information. For example, you might show a list of attributes or provide a rich interactive experience for visualizing and comparing features in a particular layer by providing custom-formatted text and charts.
Save map
After you make your map, you can save the map as an item on the My Content tab of the content page.
Content in this section was adapted from “Create Maps, Save Maps” (ArcGIS.com)
Tutorials
Esri Quick Lesson: Create a map
Esri’s Learn ArcGIS Hub: New User lessons and tutorials
Vivero ArcGIS Online Walkthrough (with sample data)
Follow these links from Esri for refreshers on:
